Wallpaper strips are enumerated consecutively – the lowest numbered strip should be hung first.
Before you start: Allow the wallpaper to rest in the room for 24 hours prior to installation. This helps it adjust to room temperature and humidity.
Tools You’ll Need:
Bucket
Paint roller
Pressure roller
Pencil
Sponge
Plastic trowel
Adhesive brush
Utility knife
Level
Preparation
1
Remove Old Wall Coverings
Strip any old wallpaper or peeling paint. If the old wallpaper is hard to remove, apply warm water to loosen the adhesive.
2
Ensure a Clean, Smooth Surface
Fill any cracks or uneven areas with wall filler or painter’s putty. If the wall is porous, apply a wall primer to create a barrier between the wall and the wallpaper paste, preventing the paste from being absorbed into the wall and ensuring better adhesion. It also helps with easier removal of the wallpaper later on. Follow the drying time instructions for the filler and primer as indicated on the manufacturer’s packaging.
Wallpaper Application
1
Check the Wallpaper
You will find the strip number printed at the top and bottom of each panel — this helps ensure correct sequence and alignment.
Lay out all the strips in numerical order
Make sure the entire design forms a complete image and that there are no visible defects.
Please note: We do not accept returns for wallpaper that has already been installed.
Lay out all the strips in numerical order
Make sure the entire design forms a complete image and that there are no visible defects.
Please note: We do not accept returns for wallpaper that has already been installed.
2
Mark the Guideline
To hang your first strip straight:
- Measure the width of the wallpaper strip.
- From the left edge of the wall, mark this distance using a pencil.
- Use a level to draw a vertical line — this will be your guide for the first strip. Tip: Use a light pencil mark to prevent it from showing through.
3
Mix the Adhesive
- Fill a clean bucket with cold water (check the adhesive packaging for the exact ratio).
- Slowly stir in the adhesive powder and mix until smooth.
- Let it sit for the 10 min. before use.
4
Apply Adhesive to the Wall
Apply glue directly to the wall, covering an area slightly wider than one strip.
Work one section at a time — don’t pre-glue the entire wall.
Work one section at a time — don’t pre-glue the entire wall.
5
Hang the First Strip
- Begin from left to right.
- Start with the lowest numbered strip (strip 1).
- Align the first strip with the vertical guideline.
- Use a seam roller to press the strip gently into place.
- Avoid getting glue on the front side of the wallpaper.
6
Add Additional Strips
- Apply each strip edge to edge, ensuring no overlap.
- Align the numbered strips in order (2 follows 1, 3 follows 2, etc.).
- Match the design carefully at the seams.
- Use a seam roller to press the seams firmly but gently.

7
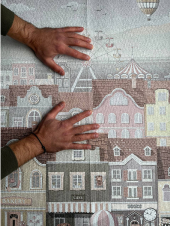
Smooth the Surface
Use a smoothing tool or your hands to remove air bubbles — always work from the center outward.
If glue gets on the surface, wipe it off gently with a damp sponge immediately. Do not rub forcefully.
If glue gets on the surface, wipe it off gently with a damp sponge immediately. Do not rub forcefully.
8
Trim Excess Edges
Once in place, trim the top and bottom excess using a sharp utility knife and a straightedge or trowel.
9
Drying Time
Let the wallpaper dry for 24 hours.
Keep the room well ventilated, but avoid drafts or direct heat sources.
Note: Vinyl wallpaper is less breathable than non-woven wallpaper. If applied to a non-porous surface or in a humid room, drying may take longer.
Take a step back and enjoy your beautifully transformed space!
Keep the room well ventilated, but avoid drafts or direct heat sources.
Note: Vinyl wallpaper is less breathable than non-woven wallpaper. If applied to a non-porous surface or in a humid room, drying may take longer.
Take a step back and enjoy your beautifully transformed space!